Language


Ubigi eSIM not working: Causes and how to fix it
Is your Ubigi eSIM not working? Find out which are the main causes and learn how to fix them or choose a better connectivity alternative.

Is your Ubigi eSIM not working? This can be a headache, but there are different reasons this is happening, and some are easier to fix than others. So, don’t rush to delete your Ubigi eSIM just yet.
Read on to find the potential causes of your Ubigi eSIM’s failure, how to fix it, and, more importantly, an alternative solution that will give you peace of mind when traveling.
Common issues with Ubigi
If your Ubigi eSIM isn’t working, you’re likely to be struggling with one of the following problems:
- Unable to connect or activate the Ubigi eSIM
- Can’t access the internet on iOS and Android
- Network not displayed on iOS devices
- eSIM not transferred to iPhone
Let’s examine each one to understand why this is happening, and then we’ll focus on the solutions.
Unable to connect or activate the Ubigi eSIM
After scanning the Ubigi eSIM QR code, it’s possible that your phone won’t automatically connect. This can happen for two reasons:
- You’re not in a location covered by one of Ubigi’s eSIM destinations.
- It’s your first time using a Ubigi eSIM. If this is the case, you might simply have to wait a few minutes for things to roll out
This can also be a compatibility issue. Keep in mind that you can use one SIM and one eSIM if you have an iPhone SE (2nd generation), iPhone XR, iPhone XS, iPhone 11, iPhone 12, iPhone 13, and iPhone 14, and later. Dual eSIM function is supported on iPhone SE (3rd generation), iPhone 13, and later.
Can’t access the internet on iOS and Android
If you’re unable to access the internet on either an iOS or Android device, it is likely that you have an existing SIM or eSIM plan activated. Your Ubigi eSIM won’t work until your previous plan has been deactivated or removed as your primary plan.
Network not displayed on iOS devices
Upon activation, your Ubigi eSIM will become the secondary data plan on your iOS device. The Ubigi eSIM won’t start working on your iPhone or iPad until the primary line is deactivated.
The Ubigi eSIM operates as a secondary data line and requires manual network selection.
eSIM not transferred to a new or the same iPhone
If you’re moving to a new iPhone or restoring data to your current device, the eSIM won’t be transferred. You’ll need to set up or transfer the eSIM separately, either using Apple’s Quick Transfer feature (if your carrier supports it) or by reactivating the plan through your carrier.
If you’re transferring an eSIM from a non-Apple device to an iPhone, you’ll need to contact your carrier to complete the transfer. Some carriers support Android-to-iPhone eSIM transfers on iOS 26.
How to fix your Ubigi eSIM
There are a number of steps you can take to fix your Ubigi eSIM. While some address specific problems, most are general solutions that can help regardless of the symptoms you are seeing.
Check device compatibility
Before purchasing, ensure your device is compatible with the Ubigi eSIM to avoid issues. Ubigi refunds don’t apply for eSIM incompatibility.
Here’s what you need to do to check the eSIM-compatibility:
- Choose your preferred Ubigi eSIM.
- Press on “Check eSIM compatible devices”.
- Browse the available iOS, Android, and Windows devices before purchasing.
If your device is not listed, avoid purchasing a Ubigi eSIM, or you can contact customer support to double-check compatibility.
Check which eSIM your device is using
If, after installing the eSIM, the Ubigi data is not working, here’s what you need to do to switch from your previous SIM/eSIM to your travel plan:
- iOS:
- Go to “Settings”.
- Tap Cellular (or Mobile Data).
- Tap Cellular Data.
- Select your Ubigi eSIM as the active data line.
- Android:
- Go to “Settings”.
- Press on “Connections”.
- Choose “SIM card manager”.
- Press on “Mobile data”.
- Change to your Ubigi eSIM and accept the changes.
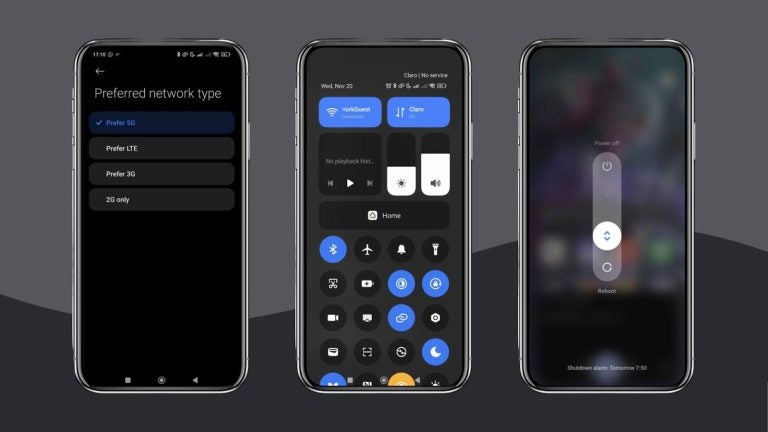
Check network compatibility
If your Ubigi eSIM is up and running – on Android or iOS – but is unable to connect to the internet, here’s what you need to do:
- Go to “Settings”.
- Choose “Cellular or Mobile data”.
- Go to “Data plans” and choose your Ubigi eSIM.
- Press on “Network selection” and deactivate the automatic option to do a manual search.
- After a few seconds, choose the “Ubigi” network or choose the available network displayed on the product page for the Ubigi eSIM you purchased.

Reinstall your eSIM on Android and iOS
As mentioned above, Apple has a limitation when transferring eSIMs. Here are some steps to follow when restoring or transferring an eSIM to your device.
Restoring or transferring data to the same iPhone or Android:
- Delete your eSIM profile before moving to the transfer or data-restoring process.
- After restoring or transferring, download the Ubigi app and log in to your account.
- Once in, go to the “Settings” menu and choose “eSIM”, and then click on “Re-install my Ubigi eSIM”.
- Follow the instructions on the screen to complete the installation process for your eSIM.
Restoring or transferring data to a new or different iPhone or Android:
- If you have access to your previous device, make sure to delete your Ubigi eSIM profile or contact Ubigi customer support to get help if you don’t have access to your old device.
- Download the Ubigi app on your new device and log in to your account on your new eSIM.
- Go to “Settings” and then choose “eSIM” and click on the “Re-install my Ubigi eSIM”.
- Follow the instructions on the screen and complete the eSIM installation on your new iPhone or Android device.
Basic solutions
If any of the previously mentioned solutions don’t work, here are some basic solutions you can try:
- Check your 3G and LTE networks are activated on your Android or iOS device mobile networks.
- Turn on and off the airplane mode and wait until the data starts working.
- Restart your smartphone or tablet in case there’s a background issue happening.
How to solve the “Final Step” issue from Ubigi?
In some cases, the Ubigi app may remain stuck on the “Final Step” during Ubigi eSIM installation. This usually happens when the device is still using another line or WiFi for data.
iOS
- Turn off WiFi.
- Go to Settings > Cellular.
- Make sure the Ubigi eSIM is turned on.
- Tap Cellular Data and select the Ubigi plan.
- Return to the Ubigi app. The setup should complete automatically.
Android
- Turn off Wi-Fi.
- Go to Settings > Connections > SIM card manager.
- Make sure the Ubigi eSIM is enabled.
- Set the Ubigi eSIM as the preferred SIM for Mobile data.
- Return to the Ubigi app to complete setup.
Ubigi eSIM still not working? Get a Holafly eSIM instead
If you have tried everything to solve the issues with your eSIM? Holafly is a great alternative to Ubigi that offers complete peace of mind when traveling.
Holafly offers customer support in 19 languages, including English, Spanish, French, Portuguese, and more. It also offers various contact channels, including WhatsApp, live chat, and 24/7 customer support.
Also, if any issue arises while using your eSIM, there’s a flexible refund policy in place to help users find an ideal solution.
Lastly, Holafly has different high-end features, like unlimited data with customizable days, data sharing for up to 1 GB per day, and coverage in over 200 destinations.
Think about your next travel destination, choose the number of days you’re traveling, stay connected with Holafly unlimited data, and forget about your eSIM not working!

Forget about eSIM issues
Get a hassle-free experience with Holafly
Disclaimer: The data in this comparison is accurate as of February 9, 2026, and is subject to change.
Plans that may interest you


I first started my content creation journey as a freelancer in 2019, before connecting with Holafly in 2021. At Holafly, my travel and tech interests come together in one place as I craft high-quality articles about the eSIM and related markets. My content aims to help travelers stay connected, wherever they are.