Scan the QR code and follow the installation steps
Scan the code sent to your email and follow the on-screen steps to install your eSIM. When you arrive at your destination, follow the activation instructions to connect to the internet.
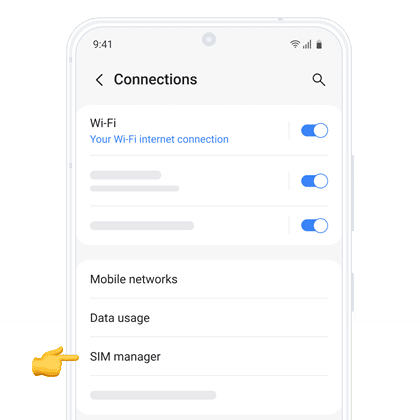
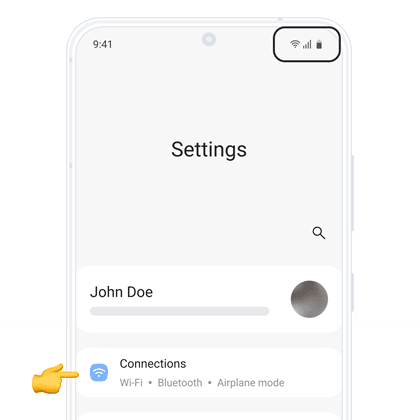
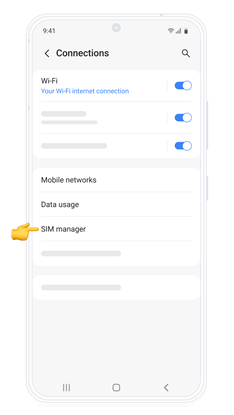
Go to your phone settings and then to “Connections”. Verify that you have a stable internet connection (Wi-Fi or mobile data).
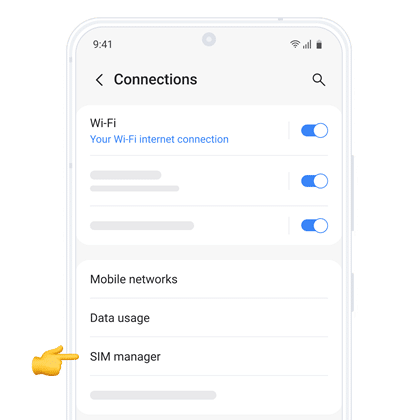
02. SIM card Manager
When you enter “Connections”, look for “SIM card manager” to find your eSIM installation options.
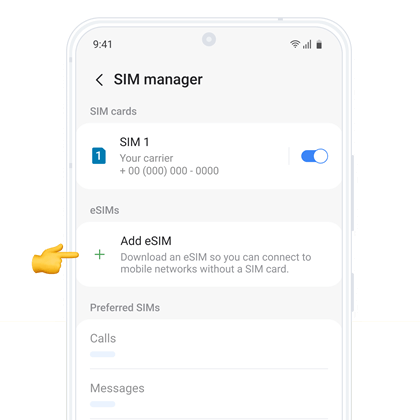
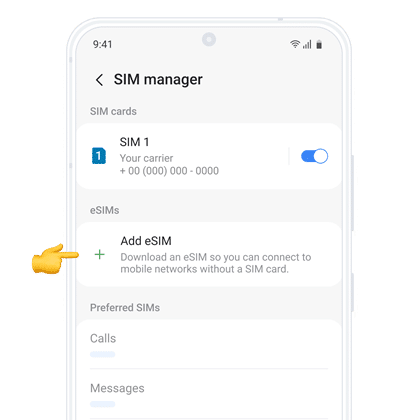
03. Add your eSIM
Under “eSIMs”, select “+ Add eSIM” to start the installation process of your new mobile plan.
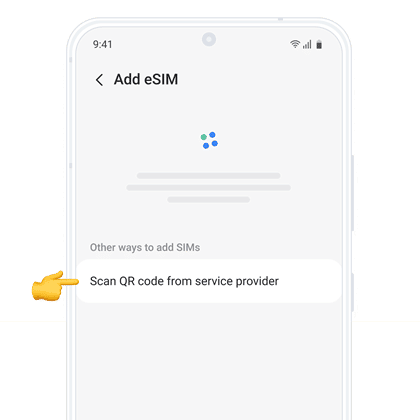
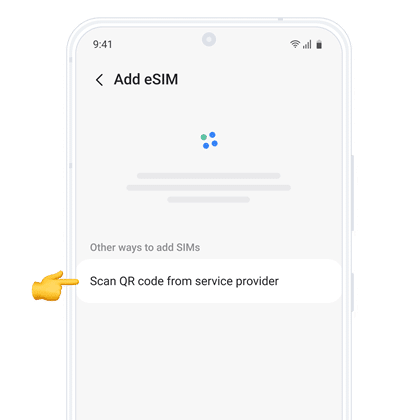
04. Installation Options
Select “Scan QR from service provider”. Have the QR code ready, either printed or on another device. This code will be sent to your email when you make your purchase.
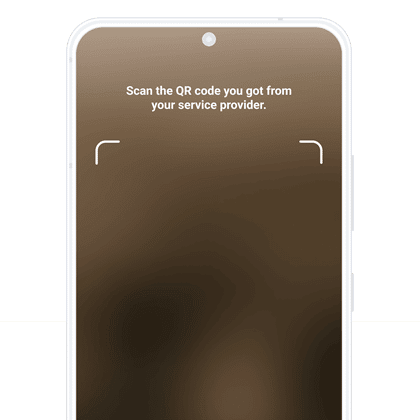
05. Scan the QR code
Scan the QR code we sent to your email by pointing the box shown on the screen over the QR code. Wait a few seconds while your new mobile plan is identified.
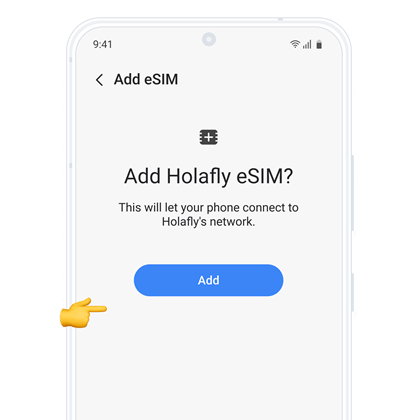
06. Add your mobile plan
Wait a few seconds until the plan is identified. Press “”Add”” to add it to your device.
07. Label your new data plan
If you want to change the name of your eSIM, click on your new plan and select the option that says “Name”.
We recommend naming it, for example “Holafly Spain.”
Let’s get started together
01.
Open your email
Find the email where we sent you the Android activation code when you made the purchase.
If you have not received your code, please contact us.
02.
Open “Settings” on your device
Press “Connections” and enter the “SIM card manager”. Now press “Add eSIM” to start the installation process.
03.
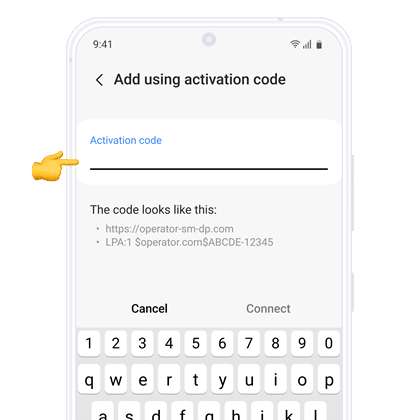
Follow the installation steps
Select “Scan QR from service provider”, and press “Enter activation code”. Follow the steps that your device displays.
Open “Settings”, go to “Connections” and then go to the SIM card Manager.
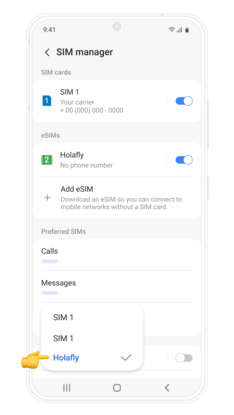
02.
Under “Preferred SIMs”, press “Mobile data” and select your new Holafly eSIM.
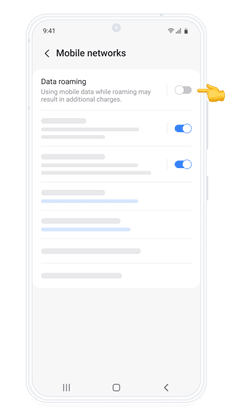
03.
Go back to “Connections” and enter “Mobile networks” and turn on “Data roaming” to activate your eSIM.
That’s it! Your plan is now active and you can start using your data.
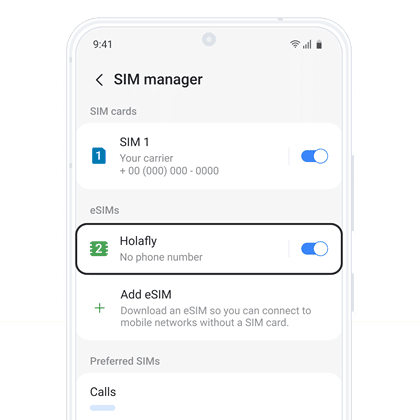
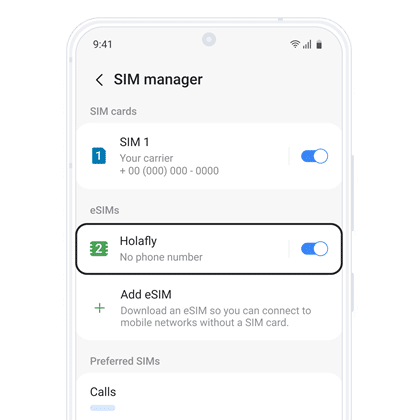
How do you know that your eSIM is active?
How do you know that your eSIM is active?
You can check in two ways:
01.
Make sure there is at least one bar in the new signal icon on your phone.
02.
In your device’s settings, go to “Connections”, and click on the “SIM manager” option. Verify that your new plan is activated and that it is selected as the preferred SIM for mobile data.
Don’t worry; we are here for you!
We know this process is not easy, so you can find us 24/7 in our Support Chat.
Change of plans? No problem at all!
Refund for Service Withdrawal
If there have been changes in your plans and you no longer need your Holafly eSIM, we will provide you with a full refund.
Refund for Incompatible or Locked Device
If you purchased the eSIM and it turned out to be incompatible with your device, we will provide you with a full refund.
Refund for Connection Issues
If your eSIM doesn't work due to an issue with Holafly or the network infrastructure of the destination country has problems and is unstable, we can offer you a full or partial refund.


 Language